 Have you ever wondered about starting your own plants from seed but don’t know where to start? Have you tried to start seeds but haven’t been satisfied with the results? Either way, this post is for you.
This post contains affiliate links for your convenience. I only promote products I love.
If you just look at the cost of a packet of seeds, growing a plant from seed appears to cost a lot less than buying the same plant. You may wonder….
Is starting seeds at home worth it?
Well… it depends. It depends on:
- what plants you want to grow
- the indoor environment you have or are willing to create
- your available time (be honest!)
I’ve learned this the hard way, and lost plenty of seedlings to poor planning, poor conditions, or plain old neglect. Unfortunately, science has yet to create a “no maintenance” plant. Living things do need a certain level of care.
Although I’ve had my fair share of failures starting seeds, I’ve also had some great successes as well. Here are six “secrets” that will help you get a gardening “win” under your belt.
1. Decide where all the growing will happen before you buy any seeds.
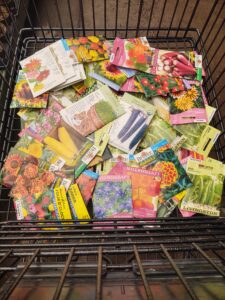
You really should have a plan when shopping for seeds. Or leave your kids at home. Do as I say, not as I do!
This is not a minor point. It really dictates how many plants you can grow successfully. Depending on what you are growing, you may need to transplant seedlings to larger containers– so include this space in your planning.
I have made the mistake of underestimating the space needed, and that just makes for crowded plants that aren’t as healthy and vigorous as they would have been with adequate space.
For years I used a baker’s rack as shelving for all my menagerie of plants, but also for starting seeds each spring. The width fit a standard flat perfectly and I could just line them up under 48″ shop lights attached to the shelf above. I also had an entire spare bedroom filled with this rack, additional plants around the room, and all sorts of craft supplies. So as you might imagine, I started quite a few seeds, grew a lot of plants, and let my creativity flow back then.
But life has a way of changing, and kids expect to have a bedroom of their own, so my crafts were reduced to two small storage cabinets, my plant population was culled substantially, and the baker’s rack was repurposed elsewhere. And I haven’t started any seeds since before I was a mom.
I’m determined to resume seed starting this year. My available space is severely limited these days but I found a mini-greenhouse that is just the right size for what I want to do. Each shelf fits two standard flats and I can set it up temporarily and take it down once seed starting season has passed.
2. Lighting is crucial for success with seeds.
As much as I have tried to convince myself otherwise at times, I have never found a windowsill bright enough for growing healthy seedlings. But if you want spindly weak seedlings that snap in half as soon as they set foot outside, a windowsill is a great choice.
I’ve been looking and daydreaming about the plant light setups in a couple of my favorite gardening catalogs. But as attractive as they are, you don’t need a fancy setup with a fancy price tag.
Years ago, I had outstanding results using a standard 48-inch long fluorescent light fixture with one warm and one cool bulb. “Warm” lights usually look a bit orange or yellow to the eye, and are often labelled as being for “kitchen and bath”. “Cool” lights have a bluish cast to them. Used together, these lights cover all wavelengths of light plants need for healthy growth and are far less expensive than specialty grow lights.
Adjust the fixture to be as close as they can be to the seedlings without touching them; boost your planted trays up towards the lights if you can’t get the lights low enough. Add a simple household timer set to sixteen hours each day of lights “on”, and you have your very own lighting system.
Another option that has become dramatically more affordable are LED grow lights. I remember the first time I heard someone talk about using them for seed starting. I was excited about the prospect of not buying more fluorescent bulbs until I saw the price– just a small fixture to light a couple of flats was over $150. Scratch that idea. I did buy an LED grow light intended for an individual houseplant that year that cost $30.
While setting up my new mini-greenhouse, I revisited the LED grow light idea. I was excited to find that the same sorts of fixtures that cost $150 on up when I first researched them now only cost about $30– the same cost as the LED I bought for an individual plant years ago!
Unlike fluorescent bulbs, everything I’ve read about LED grow lights says they don’t need to be placed as close as possible to seedlings. In fact, the directions with the lights I bought specifically said to put the lights at least 12-inches from the plants.
They look bizarre– the lights are in a grid pattern, some red and some blue to cover the wavelengths of light plants need for healthy growth. I’m not totally convinced that the lights shouldn’t be closer to the plants– but so far what information I’ve found says as long as the plants are bathed in the light they should be ok. At this point using these lights is a completely new adventure for me. I’m crossing my fingers that it’s a success!
Keep in mind that for most seeds, lights of any type aren’t needed until the seeds germinate. After that though, they’re essential. I usually start out with the lights on right after planting because no matter how closely I watch them, my seeds always sprout when I’m not looking. Without adequate light, seedlings will stretch and get spindly quickly.
3. Controlling temperature is a game-changer.
Temperature is also important for seed germination. Generally speaking, keeping seeds a little on the warm side will speed germination. So a chilly basement is not usually a good choice for seed starting unless you’re willing to crank up the heat a little. Thankfully, you don’t need to turn the heat up in your house if you don’t want to.
An option that doesn’t involve heating your whole house is a seed germination mat. I convinced myself NOT to buy one for years. They are not cheap. Expect to pay at least $15 to $20 for one that holds a standard flat. It’s an electric, flexible, waterproof mat that provides bottom heat and promotes root growth. Like I said, I resisted buying one for years, thinking they were too expensive. Then on a whim one year I tried one.
I was completely amazed with the results. My seeds germinated faster, a higher percentage of them grew, and they all germinated within a day or two of each other. To me that made it worth every penny.
Today, I use a seed germination mat that fits two standard flats. There are different sorts of mats out there. Some of them just heat the flat 10-20°F warmer than the surrounding air. The mat I bought had an optional thermostat. I decided to try the thermostat since my new seed starting location is in a spare bedroom that can be quite chilly. So far it is working quite well.
4. Not all soils are good for starting seeds
It may be tempting to use garden soil for planting seeds. But even the best garden soil is usually too heavy for young seedlings to grow up through. Besides that, garden soil is likely to have fungi and bacteria present that may kill young seedlings.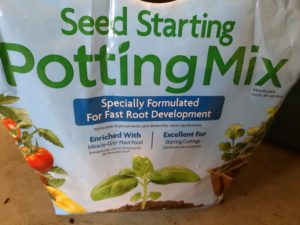
The best choice is a commercial seed starting mix, available at local retailers. Most are very high in peat moss and a lightweight mineral called vermiculite. These mixes are very lightweight and drain well. Using a standard soilless potting mix is an option too, though it is a bit heavier than seedling mix.
5. So many choices for containers….
If you don’t want to mess with buying seedling mix and finding containers, there is an option for you. It’s the most expensive choice, but one I used for years purely out of convenience. “Jiffy 7’s” are the common brand name of compressed disks that expand when wet, forming a filled pot ready to plant.
Another option is a peat pot. As the name suggests, it’s made of compressed peat moss. Other biodegradable options are paper pots, or even pots made from manure. Any of these options must be filled with seed starting mix prior to planting, but like the Jiffy 7’s, they can be planted pot and all when the time comes.
If you choose to use regular pots or recycle plastic household containers, take the time to sanitize them. Wash with soap and water, and rinse thoroughly with a 10% solution of bleach. This reduces the chance of seeds or seedlings succumbing to fungi or bacteria that may be lurking on the surface.
Covering flats or containers with plastic to conserve moisture will help speed up germination. You just have to remember to take it off once the seeds germinate!
You can buy all sorts of clear plastic domes that fit over flats or pots, but there are plenty of items around your house to repurpose and use for next to no cost. Plastic wrap lightly draped over a newly planted flat will hold moisture in. Fast food or deli salad containers with clear tops make great seed starting chambers. Just fill them with your planted pots, cover and you’re all set. When the seeds sprout, it is easy to prop the top open to allow fresh air in.
My Favorite Seed Starting Supplies:
- Mini Greenhouse— This is a general link to several styles of portable greenhouses. The one I have has four shelves and a zippered front door you can fold up out of the way.
- LED plant lights— This is the link for a light very similar to the one that I’ve been using with success. (The one I originally bought is no longer available. I did have to modify the hanger by using a thin chain and s-hooks so I could adjust it to fit my shelves and be as close to my seedlings as possible.
- Seedling Heat Mats— These mats fit 2 standard flats and fit well in my 4-shelf mini greenhouse. I added this thermostat to keep the soil temperature around 75°F.
- Seed Starting Mix— There are tons of seed starting mixes out there. They are all lightweight and drain well. I don’t have a particular brand favorite here, but it is worth the effort to use a seed starting mix. In my opinion, I get better germination using any one of these mixes.
- Containers— I’m a huge fan of using standard flats with a clear greenhouse cover. You can find these sold with either inserts you fill with seed starting mix, or flats filled with Jiffy 7’s. The flats can be refilled each year. If I end up needing to transplant to larger containers from the flats, I prefer peat pots in a tray or flat so that I can bottom water them. Bottom watering, where you fill the tray or flat to water the plants rather than sprinkling from overhead, reduces fungal problems on the seedlings’ leaves.
6. Not everything is worth the time and effort of growing from seed
So you have the perfect spot—time to buy seed and supplies. Do a little research before you buy any seed. Just because you can start something from seed, doesn’t mean it’s the best way to grow a particular plant. Consider the cost in both dollars and time when deciding what to plant.
When we first moved into our house, we had a brand new landscape with nothing but really crappy, rocky soil. We planted a few things that first year, but there was just so much dead space. I knew that I wanted to fill the spaces with annuals, specifically Wave® petunias since they are so awesome at filling in and they flower like crazy. At the time, they were a new annual, and you could only buy them in fairly large pots that came with a larger price than most other annuals.
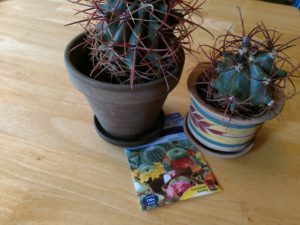
I started these cacti from seed back in spring 1992. I’m starting some again this year just for fun.
We couldn’t afford to buy as many plants as we needed, but we could afford the seed. For the first few years in our house, I grew lots of Wave® petunias myself at a fraction of the cost of buying plants at the garden center. As an added bonus to ordering seed from catalogs, I was also able to buy some color combinations that weren’t available locally.
A plant I would never grow from seed, though you can find the seed for it, is asparagus. One of the few perennial vegetables, you will see it on occasion in seed catalogs and stores. The back of one packet I saw said you could expect to harvest asparagus 1095 days after planting (3 years). Not exactly encouraging. Most people plant asparagus as 1- or 2-year old transplants, reducing the wait time until harvest.
Sometimes the only way you can grow a particular plant is to start it from seed. I love growing all sorts of different tomatoes. Garden centers typically have a fairly limited selection of plants, so if you want to grow anything unusual, you need to start from seeds.
Read seed packets carefully. Catalogs don’t always provide planting information, so you may have to do a little research. Some seeds need special treatment, such as nicking the outer coat, chilling, or exposure to light in order to germinate.
It’s also important to time your planting so that the seedlings will be ready to transplant to the garden when the danger of frost is past. For some plants, this will mean planting twelve or more weeks before the last frost. The “typical” last frost date for central Illinois is around Mother’s Day, or May 15th. Look up your own area’s frost-free dates here. Remember this is not an absolute, just an estimate. You still have to pay attention to the weather forecast before planting outdoors!
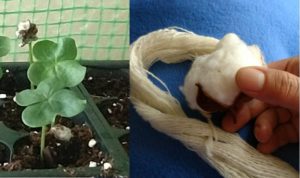
The seedlings on the left are not 4-leaf clovers– they’re cotton plant seedlings. If all goes well, I’ll be harvesting cotton bolls like the ones pictured on the right and spinning better yarn than what you see here– my first attempt at spinning cotton.
Some seedlings need to be thinned, and sometimes the remainder transplanted into larger containers in standard potting mix before they are planted outdoors. Tomatoes are a great example. They should be thinned to one plant per pot after they get their first set of “true” leaves, and typically need to be in at least a two or three inch pot after several weeks. Thin plants with your fingertips or scissors—yanking them out will likely disturb the plants you want to keep.
You also still need to slowly acclimate your seedlings to the harsh conditions outdoors. After a weeks of pampering indoors, seedlings need time to adjust to the sun and wind outdoors. Seedlings should be placed for increasing lengths of time in a sheltered location outdoors over several days before planting for best results.
Hopefully these “secrets” will encourage you to start something from seed this year if you haven’t tried before. If your seed starting adventures have been less than successful in years’ past, I hope some of these “secrets” helped you zero in on the source of the problems.
If you liked this post, please subscribe to Grounded and Growing today and receive your copy of “15 Tips to Become a '15 Minute Gardener'” so you can spend less time working ON your garden and more time enjoying being IN your garden.! It’s absolutely free. When you join the Grounded and Growing community, you’ll finally take the garden off your “To-Do” list and allow yourself time to enjoy your garden and savor the peace and serenity there. I tell subscribers about new posts as soon as I hit ‘publish’ and send weekly-ish updates on what’s going on in my garden– good, bad AND ugly.

All Rights Reserved. © 2018 Jennifer Schultz Nelson.
[…] child’s school seedling along has ignited an interest in growing other seedlings? Check out my post on seed starting for more details and […]