 Are you looking for a delectable accompaniment to your homegrown tomatoes? Did you know you can make homemade mozzarella cheese in your own kitchen in less than an hour?
This post contains affiliate links for your shopping convenience.
I never considered making mozzarella at home until I stumbled onto an article which led me to the New England Cheesemaking Supply Company’s website. I read Ricki Carroll’s 30 Minute Mozzarella recipe and I wanted to run out and get all the supplies right then and there.
Instead, I did the next best thing:
I jumped on Amazon and ordered her Basic Cheese Making Kit, her book “Home Cheese Making“, and just because I tend to go overboard, “Mastering Artisan Cheesemaking“.
For successful homemade cheese, you have to start with “good” milk. Not all milk is created equal. A lot of milk is ultra-pasteurized, which means it is heated higher than standard pasteurizing temperatures to increase its shelf life. But it makes terrible cheese. The high heat deforms the milk proteins and they never form the proper curds needed in the cheesemaking process. Ricki Carroll has a whole page devoted to milk and to sources for “good milk“.
I had heard mixed reviews on the suitability of the milk from our local grocery store chain so I tried it. It was definitely ultra-pasteurized, as the curds never came together as cheese. But it was still edible– I just had a tasty cheese spread. So even if you can’t get your hands on “good milk” you can at least make cheese spread with this recipe. The “good milk” I used was from Kilgus Farmstead , a small central Illinois dairy whose products are readily available near me.

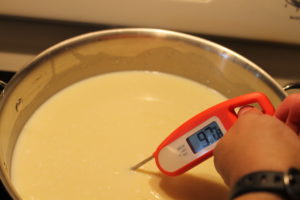
Checking the milk’s temperature while heating.
You probably already have the equipment for the 30 Minute Mozzarella recipe in your kitchen. As long as you have a pot with a lid big enough to hold a gallon of milk, a slotted spoon, a bread knife, a strainer, a microwavable bowl, and a thermometer, you’re set. The Basic Cheese Making Kit comes with the rennet needed, but you will need to purchase citric acid in addition.
It’s critical to keep track of the milk’s temperature during the cheesemaking process. I had been rigging up kitchen twine to suspend my thermometer in the pot of milk without touching the bottom– this was a royal pain. For my last batch of mozzarella I used this instant read thermometer and it was SO much easier. Be sure to give the milk a stir to distribute the heat before checking the temperature.
Supplies:
Instructions— Hands-down, Ricki Carroll’s recipe is my favorite. If you’re ready to try more of her recipes, you don’t have to go any further than her website, but I love her “Home Cheese Making” book as well.
Rennet— I’ve mostly used crushed up tablets like what’s I’ve linked to here, but I’ve also used a liquid that worked just as well. The tablets come in the Basic Cheese Making Kit that I purchased, which makes eight different kinds of cheese. For the same price you can buy a kit specifically for mozzarella and ricotta cheeses as well.
Citric Acid— I bought mine through Amazon as in the link here… but generally you can find citric acid in with the canning supplies. “Fruit Fresh” is not the same thing– it contains ascorbic acid (Vitamin C) as well as citric acid.
Pot— You need a pot that will hold a gallon of milk comfortably without any worry of overflow. Stainless steel is preferred as you know it can be sanitized thoroughly and won’t transfer weird flavors from previously cooked dishes.
Skimmer Spoon— I bought mine at Ikea 20 years ago, but this link is very similar to what I have. It works so much better than a slotted spoon.
Bread Knife— A nice long serrated bread knife is the best tool for cutting the curd into cubes while making your mozzarella (or any cheese really). The longer knife lets you get to not only the bottom of the pot, but also diagonal cuts to break the curd into cube-like shapes. More surface area on individual pieces of curd speeds up the cheesemaking process.
Strainer— I’ve used my regular colander lined with cheesecloth to strain curds successfully, but I’ve also used a fine-mesh strainer similar to the one in the link with or without the cheesecloth. Personally I think the curds drain better with the fine-mesh strainer.
Thermometer— If you buy the cheesemaking kit, it comes with a thermometer. There’s not a darn thing wrong with it except it’s really hard to read. It’s also challenging to monitor the temperature at critical points because it takes a few seconds to register a temperature. When I first made mozzarella I rigged up some kitchen twine across the pot and tied the thermometer so it would contact the milk “just right” without resting on the bottom of the pot (which would be an inaccurate temperature). I had purchased the thermometer in the link just for general kitchen use and it is SO great for cheesemaking. It’s easy to read and registers pretty much instantly. I don’t bother with the thermometer from the kit anymore.
I followed the recipe as written except for two steps:
- I prefer more of a fresh mozzarella texture, so I eliminated the last 35 second microwave step. If you like a firmer mozzarella that you can shred, keep the last microwave step.
- I added salt after the first (one minute) microwave step rather than during the final kneading. I find it’s difficult to completely mix the salt in if I wait until the final kneading.
While you can make this mozzarella recipe with lower fat or nonfat milk, you may not like the results. A friend and I made the recipe with nonfat milk and the resulting “cheese” had the taste and texture of the plastic cheese in my children’s play kitchen! We couldn’t stand to eat it.

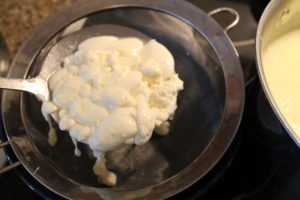
Straining curds before microwave step.

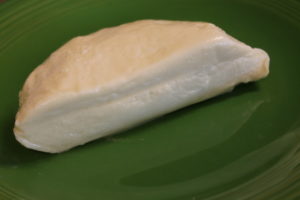
Finished homemade mozzarella
Though this is certainly not the healthiest recipe you could be making, you probably won’t make it every day. Though trust me, you WILL want to– it’s that good. The first time I made this recipe, me and three co-workers ate the entire batch (one pound) of cheese in one sitting–you’ve been warned.
I’ve gone on to make a few other cheeses with my Basic Cheese Making Kit– cheese curds and farmstead cheese plus ricotta from the leftover whey. They were all delicious, but with the exception of the ricotta, they took A LOT more time to make– pretty much a full day (plus aging for the farmstead cheese).
I’m not going to go into the cheese making business any time soon. But will I make the occasional batch of cheese? You bet. I know some people may roll their eyes and think “just go to the store and buy some cheese”. But there’s something very relaxing about surrendering to the process– of a lot of things, not just cheese making. In a world that moves faster all the time and demands instant results, it’s a nice escape to work on projects (like gardening?) that take some time, making the end product that much more enjoyable.
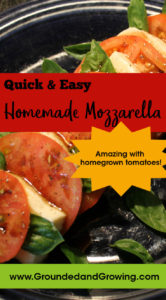
As if homemade mozzarella could get any more delicious, I paired my last batch with a perfectly ripe tomato from my garden, some home grown basil, and a drizzle of olive oil plus my favorite balsamic vinegar. I’m sure I will dream of it this winter!
Even if you don’t have a traditional vegetable garden, growing tomatoes in small spaces is very possible using containers. You can even grow them indoors with the Aerogarden. Don’t let lack of space keep you from delicious homegrown tomatoes!
If you liked this post, please subscribe to Grounded and Growing today and receive your copy of “15 Tips to Become a '15 Minute Gardener'” so you can spend less time working ON your garden and more time enjoying being IN your garden.! It’s absolutely free. When you join the Grounded and Growing community, you’ll finally take the garden off your “To-Do” list and allow yourself time to enjoy your garden and savor the peace and serenity there. I tell subscribers about new posts as soon as I hit ‘publish’ and send weekly-ish updates on what’s going on in my garden– good, bad AND ugly.

All Rights Reserved. © 2017 Jennifer Schultz Nelson
What a great idea…for the younger ambitious person who loves cooking and home made products and has someone to feed it to. Being 72 and living alone, I look for ways to spend less time in the kitchen and to eat less, I think I will purchase from the store. I do make everything myself, no box foods for me but making everything myself I always end up with more than I can eat. Impossible for me to make soups for one person so I have found by trial and error what can go in the freezer for later. I also like to show off my cooking skills so I like to share. Keep sharing Jen.
I have posted a GoFundMe page to help with the publishing of my children’s Books. Hopefully the first one will be in stores late 2017.
Yeah, making cheese is not high on everyone’s list. I get that. And don’t think I only make it since I have people to feed. I would gladly eat it all myself, which creates its own set of problems!