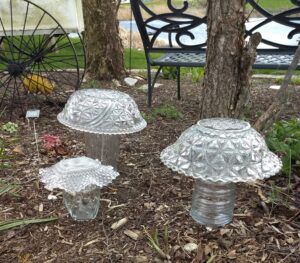
This quick and easy DIY garden art project can be done in less than 15 minutes and ready for garden display in 24 hours. You won’t be able to make just one!
This post contains affiliate links for your shopping convenience.
I’m a sucker for garden art– and my definition is a very loose one. We have everything from dollar store pinwheels to hand-forged metal sculptures accenting our gardens. If we think it looks good, it’s fair game.
Somewhere down the rabbit hole of Pinterest about a year ago I saw a picture of glass mushrooms made from a vase with a punch bowl turned upside down on top of it. It was one of those things I put in the back of my mind to do “someday”.
On a random Wednesday in early spring, for no particular reason, this project came to the front of my mind as my son and I foraged in the local thrift store. We had so much fun pairing up vases with glass bowls! We left with the makings of four mushrooms for less than $10 that day.
If you don’t have a thrift store near you, I would see what the dollar store or garage sales have to offer. I think part of the fun is the hunt and the thrill of a good bargain too!
Supplies:
- Glass vases & bowls– you are limited only by your imagination!
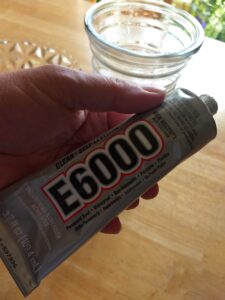
- Adhesive suitable for glass AND outdoor use– I chose E6000 and so far it has been an excellent choice. I’ve added it to my arsenal of “magic glue” for all the random repairs around the house.
Instructions:
- Make sure vases and bowls are clean and free of any dirt or adhesive residue, particularly where you will be applying new adhesive.
- Figure out which vase and bowl combinations you like best, Note where the vase touches the bowl so you know where to put the adhesive. Ideally, the entire top of the vase will contact the bowl so when it’s glued together it will form a tight seal and not let water, dirt, or anything else into the vase.
- I found it easier to put the mushroom together upside down. The E6000 adhesive is self-leveling, so you will
 notice it smooths out after it’s dispensed. It does not stay in a “bead” like caulk for very long. I made my first mushroom by applying the adhesive to the top of the vase, and this self-leveling feature means you must work fast or the adhesive will start to drip down the side of the vase (which I learned the hard way). It’s much easier to apply the adhesive to the inside of the bowl and then add the vase on top.
 - Keep the mushroom upside down for 24 hours to be sure the adhesive is cured before setting it upright. Otherwise, the vase or bowl may slip out of place, or the adhesive may drip down the sides of the vase.
- Place the finished mushroom where ever you feel like you need a little sparkle.
Variations
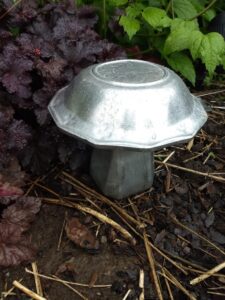
- I found a cute metal bowl when I was in search of mushroom supplies. I ended up taking a clear glass vase that went perfectly with the metal bowl and painting the inside with silver metallic spray paint. By spraying the paint on the inside of the vase, that protects it from the weather and being scratched off.
- I sprayed the inside of the clear glass vase with just a tiny bit of water before spraying the paint. This made the metallic paint look swirly and I loved the look. You could of course just spray the metallic paint without the water for a more solid metal look.

- Nothing says you have to use clear glass vases and bowls. You could use ceramic, colored glass, or any combination of materials.
- Also consider adding items to the inside of the vase. Rocks, shells, or glass gems would all be great options. Pretty much anything that would be totally dry and not deteriorate over time would be great candidates. Any moisture sealed up inside the vase may breed mold over time.
If you like this post, be sure to check out some of my other popular DIY projects, like Stained Glass Stepping Stones, Succulent Kokedamas, and Mosaic Flower Pots!
If you liked this post, please subscribe to Grounded and Growing today and receive your copy of “15 Tips to Become a '15 Minute Gardener'” so you can spend less time working ON your garden and more time enjoying being IN your garden.! It’s absolutely free. When you join the Grounded and Growing community, you’ll finally take the garden off your “To-Do” list and allow yourself time to enjoy your garden and savor the peace and serenity there. I tell subscribers about new posts as soon as I hit ‘publish’ and send weekly-ish updates on what’s going on in my garden– good, bad AND ugly.

All Rights Reserved. © 2020 Jennifer Schultz Nelson.
Leave a Reply