Are you tired of killing the plants that your kids bring home from school? Your home does not need to be a horticultural death row.
This post contains affiliate links for your shopping convenience.
‘Tis the season for soil-filled plastic cups.
I met my son in the parent pickup line after school last week and he emerged from the building cradling a plastic cup with a leggy sunflower seedling swaying along with each step.
I heard a groan from the group of moms I was waiting with– “Oh great, another plant for me to kill,” joked one mom. The other moms nodded in knowing agreement.
So I thought– could this plant be saved? I don’t think the plastic cups of seedlings making their way home this month are necessarily “dead plants walking”.
Here are a few tips to keep your school plant alive:
-
- Know your plant. What kind of plant is it? What conditions does it need? Is it an outdoor or indoor plant? Will you plant it in pot? Or directly in the ground? Ask Google. Ask me. But figure it out and make a plan.
- Support the stem. Most plants grown in classrooms don’t receive nearly enough light, so they stretch out toward whatever light they can reach. Which results in a long, fragile stem. If it breaks, most plants are done. Dead. So give the plants some support for now. Bamboo skewers, wooden chopsticks, or plastic forks are all good options. If you need to secure the stem to the support, use string, yarn, a twist tie or something similar but be gentle. If you crush the stem that plant is a goner. You probably have other options in your kitchen or garage right now. Get creative.
- Check the container for drainage holes. My son’s plant was in a peat pot (great drainage) inside a plastic cup (no drainage). It’s a fine setup, but after watering I just need to double check that the plant isn’t sitting in excess water. Add holes to your container if needed, but when you add water it must have a way to drain out.
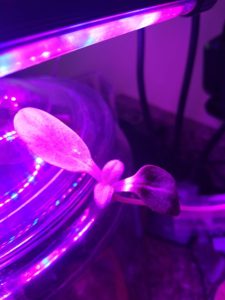
- Give the plant as much light as possible. Put your plant in the sunniest window you have. Most classroom-grown seedlings are starved for light. If you have other plants at home, consider investing in an LED plant light. I can’t say enough good things about this compact model I have on my kitchen counter. My son’s plant perked up dramatically and grew two new leaves since I set it under this light a week ago. If you are a chronic plant killer adding light may reform you and spare the lives of countless innocent plants!

My son’s sunflower seedling has grown 2 new leaves in a week under my LED grow light on the kitchen counter.
- Fertilize. Most classroom-grown seedlings could also use a dose of fertilizer to perk them up. Even if they received some fertilizer at school, without adequate light (which is usually the case) their growth is weak. Mix up some water soluble fertilizer at half- or quarter-strength according to the label and use it whenever you water. Fertilizer plus proper light and water will work wonders in a short time.
- Give your plant a chance to grow indoors before even thinking about setting it outside. Even if it’s an annual that is supposed to love full sun (like my son’s sunflower seedling), putting an indoor-grown plant directly outdoors in the sun will kill it. Keep the plant indoors until you have at least two strong “true” leaves. The first two leaves that emerge from the seed are called “seed” leaves and usually are relatively small and look nothing like the leaves on the full-grown plant. True leaves develop after seed leaves and look more like what you would associate with that plant.
- Don’t put the plant outside in the sun and wind right away. Your plant needs some time in a sheltered, at least partially shaded spot outside for awhile before it’s strong enough to survive full sun and wind exposure. The technical term is acclimatization. If you have houseplants that you put outside for the summer (which you should do if you never have) you do the same thing– put them outside in a sheltered shady spot for awhile so those that like sun don’t burn to a crisp when they finally feel the sun. How do you know when to move the plants to full-sun? I’d say after about a week in sheltered partial shade they’ll do alright in full sun and wind. If that makes you nervous, move them to full exposure for a morning or afternoon and see how they do. Try it for a little longer the next day, etc. Also don’t forget to pay attention to the weather and your location’s average frost-free date. These charts look confusing until you realize they are talking about averages and probabilities. For my location, mid-May is the green light to plant anything outside because the chance of freezing temperatures after mid-May is very small.
Supplies for plant survival:
** Supplies in green are affiliate links for your shopping convenience.
My favorite LED plant light— If you don’t like this one, keep looking on Amazon; I promise there is an LED plant light to fit just about any indoor space.
Water-soluble fertilizer— pick one, follow the directions and use it regularly. The best fertilizer is the one you will actually remember to use.
Has nursing your child’s school seedling along has ignited an interest in growing other seedlings? Check out my post on seed starting for more details and information.
If you liked this post, please subscribe to Grounded and Growing today and receive your copy of “15 Tips to Become a '15 Minute Gardener'” so you can spend less time working ON your garden and more time enjoying being IN your garden.! It’s absolutely free. When you join the Grounded and Growing community, you’ll finally take the garden off your “To-Do” list and allow yourself time to enjoy your garden and savor the peace and serenity there. I tell subscribers about new posts as soon as I hit ‘publish’ and send weekly-ish updates on what’s going on in my garden– good, bad AND ugly.

All Rights Reserved. © 2019 Jennifer Schultz Nelson.
Leave a Reply