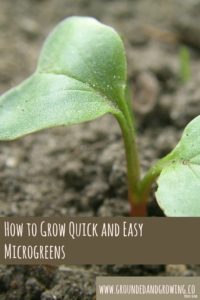
Microgreens are tiny nutritional powerhouses that you can grow on your windowsill with a few simple supplies.
The first time I tried microgreens, I almost didn’t realize what they were. They were garnish on a dish I had ordered while out to dinner. At first glance they just looked like parsley. But on first taste they had a ton of flavor. Upon closer inspection I could see that I was eating entire tiny plants.
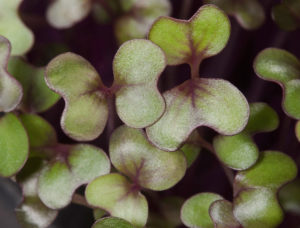
Microgreens are a close cousin of sprouts. Microgreens are seedlings grown to fully expanded cotyledons or one true leaf. Unlike sprouts, typically grown in the dark without soil, microgreens grow with light in a soilless mix. When you eat sprouts, you eat all the plant parts– leaves, stem, roots and any remaining seed; when you eat microgreens, you only eat the above-ground stems and leaves.
Gourmet chefs have used microgreens for years. You’ll find them in salads, as salads, or as garnishes on various meat and vegetable dishes. Microgreens are more and more popular with home chefs and gardeners each year.
It’s budget friendly to grow your own microgreens rather than purchase them in the store. Growing microgreens is very hand labor-intensive, which drives up the cost. They are also extremely perishable, and so their shelf life is very limited.
Many crops grow as tasty microgreens. Leafy greens like lettuce, chard, spinach, kale, and arugula are delicious microgreens. Cruciferous vegetables, such as broccoli and cabbage are also good choices. Beets, radishes, celery, basil, and dill are also flavorful microgreens. There is a carrot cultivar called ‘Rumba’ that is said to have a distinct carrot flavor in its tops, rather than bitter like most other carrots, making it a great microgreens candidate.
Not only are microgreens packed full of flavor, it turns out they are filled with nutrients as well. Research published in 2012 in the Journal of Agricultural and Food Chemistry evaluated 25 different microgreens for their nutrient content. They looked at four major groups of nutrients that include Vitamin K, Vitamin C, Vitamin E, lutein and beta-carotene. Reportedly the microgreens had anywhere from four to forty times higher levels of nutrients than the mature plant of a given species.
You can grow your own microgreens at home.
All you need is a shallow tray, soil mix, your favorite seeds, water, and a sunny window.
- Start with a shallow tray. You probably have something entirely appropriate to use at home right now. Many of the plastic containers that once held deli or produce items are excellent choices.
- Sectioned fruit or vegetable trays are perfect for growing multiple types of microgreens, each in their own little compartment. This is one occasion where the container doesn’t need holes for drainage, provided you trust yourself to add water very carefully without overwatering.
- A standard soilless potting mix, such as what you would use in containers outdoors or houseplants is perfect for microgreens. You may also choose a seed starting mix. If you wish to lighten the mix further, mix half and half with perlite. Don’t worry about using a mix with fertilizer added—you don’t need it since you will harvest the microgreens so quickly.

Photo: Peggy Greb
- Moisten the mix slightly before planting. It should be damp, not sopping wet!
- Fill your chosen tray with ¾ to one inch of soil mix. Plant the seeds in a single layer very close together but not touching. An eighth of an inch for tiny seeds to a quarter of an inch apart for larger seeds is a good distance.
- Water the seeds, being careful not to wash them away. Using a spray bottle for watering can help prevent washing the seeds out of place. If your tray does not have drainage holes, be very careful not to overwater.
Place your planted tray in a sunny spot and water as needed. You may cover the tray with a plastic cover to conserve moisture, but be cautious as the direct sun shining through a cover may trap enough heat to kill the emerging seedlings.
Within about five days the first microgreens should be ready to harvest. Sample your microgreens at various maturities to decide what you like, as their flavor may change with age. Cut them off either individually or in clumps at the base of the plant without including any of the soil mix. Harvest daily until no new seedlings emerge. Rinse well in cool water before eating.
Use your microgreens in salads or use them as the salad itself. You may also use them as a garnish on other dishes. Each plant will have a distinctive flavor. I’d like to try microgreens with my 3-year-old son this spring; I think the novelty of it all and the variety of flavors may just get him more interested in eating salad. I should have no trouble convincing my 10-month-old daughter to try them; she has been trying to eat every houseplant she can reach!
If you liked this post, please subscribe to Grounded and Growing today and receive your copy of “15 Tips to Become a '15 Minute Gardener'” so you can spend less time working ON your garden and more time enjoying being IN your garden.! It’s absolutely free. When you join the Grounded and Growing community, you’ll finally take the garden off your “To-Do” list and allow yourself time to enjoy your garden and savor the peace and serenity there. I tell subscribers about new posts as soon as I hit ‘publish’ and send weekly-ish updates on what’s going on in my garden– good, bad AND ugly.
Leave a Reply